Scratch building a hull ñ Part I
By: Onno Heesbeen
Introduction:
Welcome at my first tutorial on the Debris Field on how to scratch build your own ship model. Due to the lack of available commercial model kits of liners I started scratch building the ships I wanted in my collection. After making a few scratch builds of ships that really exist or existed and some designs of my own I started to develop a certain technique, which Iím going to discuss in this article. Though you can use this article very literally as a guideline on making your own model, it definitely is not meant to tell how it should be done. Overall you should experiment and maybe come up with certain solution so that you can develop your own skills and above all you should have fun in making your model.
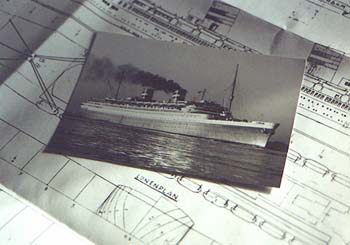
The ship I have chosen to build for the article is the Nieuw Amsterdam II from 1938 of the Holland America Line. I have some good plans for the ship and there has never been a commercial kit of this ship (besides a crude cardboard cutout model).
Research:
First you need to have a ship in mind that you want to build! What I do next is carrying out a research about the ship on the Internet, library or at the maritime museum (if available). The most important part of the research is photos (the more the better) and plans (if there isnít much to be found itís best to consider if you should build the model at all). If this is your first time I would also recommend searching for hull and body plans of the real ship, or with a model society (if available of course). It is possible to figure it out on your own but it is time consuming. After you have done the research and you are satisfied with what you got and know it is modeling time!
Materials:
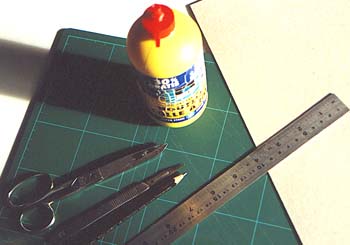
The following picture shows the materials and equipment you need for Part I of this article. I used 1mm thick cardboard, a ruler (preferably a metal one for cutting), a knife, a pair of scissors, a pencil and glue, of course itís only a suggestion and you can use whatever you think is best. It is possible to use plywood instead of cardboard but then you need to saw out the pieces.
Getting started:
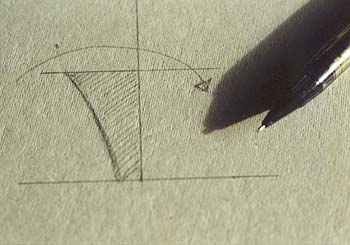
First you need to know the scale of your model so that you can scale down the hull plans of your ship (you can scale the plans down at a copy shop). Next step is to draw the hull framings onto the cardboard; you can do this by cutting out the framings on the plan and draw their outline on the cardboard or use carbon transfer paper. Mostly body plans are drawn up half because "most" ships are symmetrical you simply have to mirror the drawing to get a complete set of framings. When you draw up your own framing plan you can work directly onto the cardboard. Then you can cutout the framings. It is smart to number the framings so that you wonít need to figure out where they need to go onto the hull bottom. (And also number the those exact spots on the bottom part)
Now you can start pasting the framing parts onto the hull bottom. It doesnít really matter at which end you start of the ship; I started at the stern and worked my way towards the bow. I used a toothpick to spread the glue onto the framing parts (donít use too much glue because it gets messy) Take the part and stick it with the glued edge onto the corresponding line on the hull base.
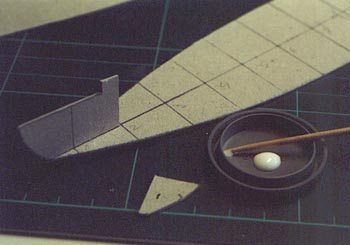
Eventually when all framing parts are in place you need to let the glue settle over a night. Donít rush or inaccuracies slip in the model because the not yet settled parts can shift around.

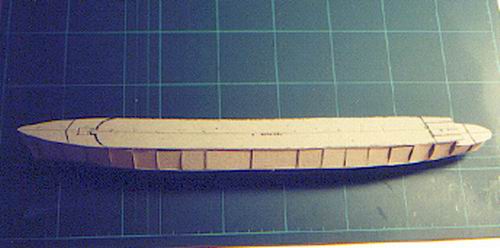
When the framing parts have settled onto the hull base, then you can start with closing off the sides of the hull. This doesnít need to be that accurate because it will only function as a support for when the sides are filled up (that will eventually be covered in part II of this article). Place the cardboard plantings for the sides a little inwards between the framings. Be careful that the side plates arenít
beyond the framings or else they will protrude from the hull when you fill up the sides.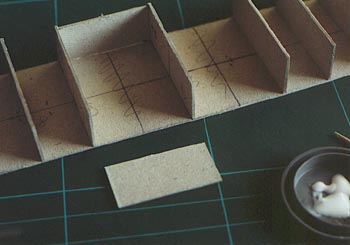
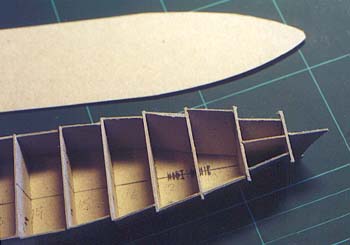
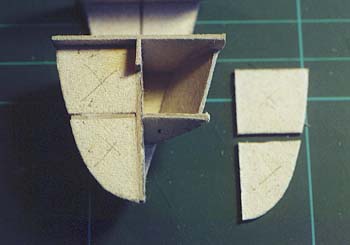
Again you need to let the glue settle for a while before you can place the upper covering of the hull, in this case with this particular ship you also need to place the separate covering parts on the stern because it is one deck lower then the rest of the hull.
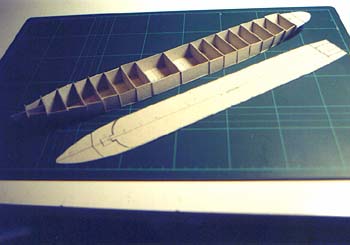
Now the hull is roughly finished and ready for the sides to be filled up, but thatís a subject that is going to be handled in the next part of this tutorial.
I hope you have fun trying out my technique and maybe even come up with some new techniques on your own. You could try it out with the Nieuw Amsterdam II or another ship you like best and if you have any questions, findings or remarks you can always post them on the Debris Field forum.
Success,
Onno Heesbeen